Network Isolation
There are various reasons why you might want to isolate your work notebook from other devices in your home network:
- Security concerns. The security of individual devices on your home network might vary. Some are notoriously insecure (e.g. smart home devices) or some might simply lack the latest security patches. Isolating devices with poor security from your work notebook (and other sensitive private devices) can increase the security of your work notebook.
- Privacy concerns. Bramble is an all-remote company, with many of its employees working from home. As a side-effect, our work notebooks typically end up being connected to the same network as our personal devices, which allows for network access between these two groups of devices and may raise privacy concerns.
How
Many home routers allow connected devices to be isolated, which prevents any direct network communication between selected devices. This section walks you through setting up an isolated WiFi specifically for your work notebook. The goals specifically are:
- Prevent direct connections to and from your work notebook towards other devices in your home network.
- Prevent your work notebook from accessing your router’s management interface.
- Have internet access with your work notebook (of course :smile: )
Note that devices connected via different bands (2.4GHz and 5GHz) are typically not isolated from each other. Likewise, devices connected to your router via cable are not separated from devices connected via WiFi.
Simple Isolation with Guest Network
Many modern WiFi routers have the capability to generate bridged guest networks that separate devices on the network from each other while keeping things easy to understand. Rather than using your router’s built in guest network support for guests, you can instead use it for your work devices. This effectively works the same way as having untrusted guests connecting to your network and should isolate your work device from other devices connected to your home network.
While most routers implement guest networks as described, be aware that your router might implement guest networks differently. Check your router’s manual for details.
Note that you will likely not be able to connect to shared resources in your home network such as file servers or shared printers.
Simple Isolation with Personal VPN
A personal VPN (Virtual Private Network) can create an isolated network for a team member’s computer that could be used for isolation if the Guest Network idea does not meet your needs. This has the added advantage of being mobile, in that if you take your computer to any network (free Wi-Fi at a coffee shop, hotel network, technical conference with Wi-Fi access for attendees, etc) you can isolate it.
For more information on a personal VPN, check out the Personal VPN page.
Similar to the guest network scenario above, when using a personal VPN you will not be able to access shared resources in your home like a printer.
Advanced Isolation with DDWRT
The instructions are specific to DDWRT, which is a popular custom router firmware. If you don’t use DDWRT, you can use the provided steps as a template and consult your router’s manual to obtain a similar configuration. However, if your home router does not support setting up an isolated network, consider buying a router that is compatible with DDWRT(ToDo: check which ones support Net Isolation) or a similar custom firmware. If you do, don’t forget to expense the router (TBC, check if routers can be expensed). If you need recommendations for DDWRT routers, you can find many buyer guides online:
- Backup config. Before you start setting up your new work WiFi, you should save your current configuration so that you can restore it if necessary. To do this, go to tab Administration -> Backup.
- Create your work WiFi. On tab Wireless -> Basic Settings, go to section Virtual Interface and click the Add Virtual AP button. Choose a name for your work WiFi and enter it in Wireless Network Name (SSID).

- Advanced WiFi configuration. Tick Advanced Settings to open up more configuration opens for our newly created WiFi. Set Network Configuration to Unbridged. Enable Masquerade / NAT and Net Isolation (this option creates a couple of firewall rules that blocks your work notebook from reaching your private network and vice versa). Assign an IP address, e.g.
172.16.2.1, and set the subnet mask accordingly, e.g.255.255.255.0. Hit Save at the bottom of the page.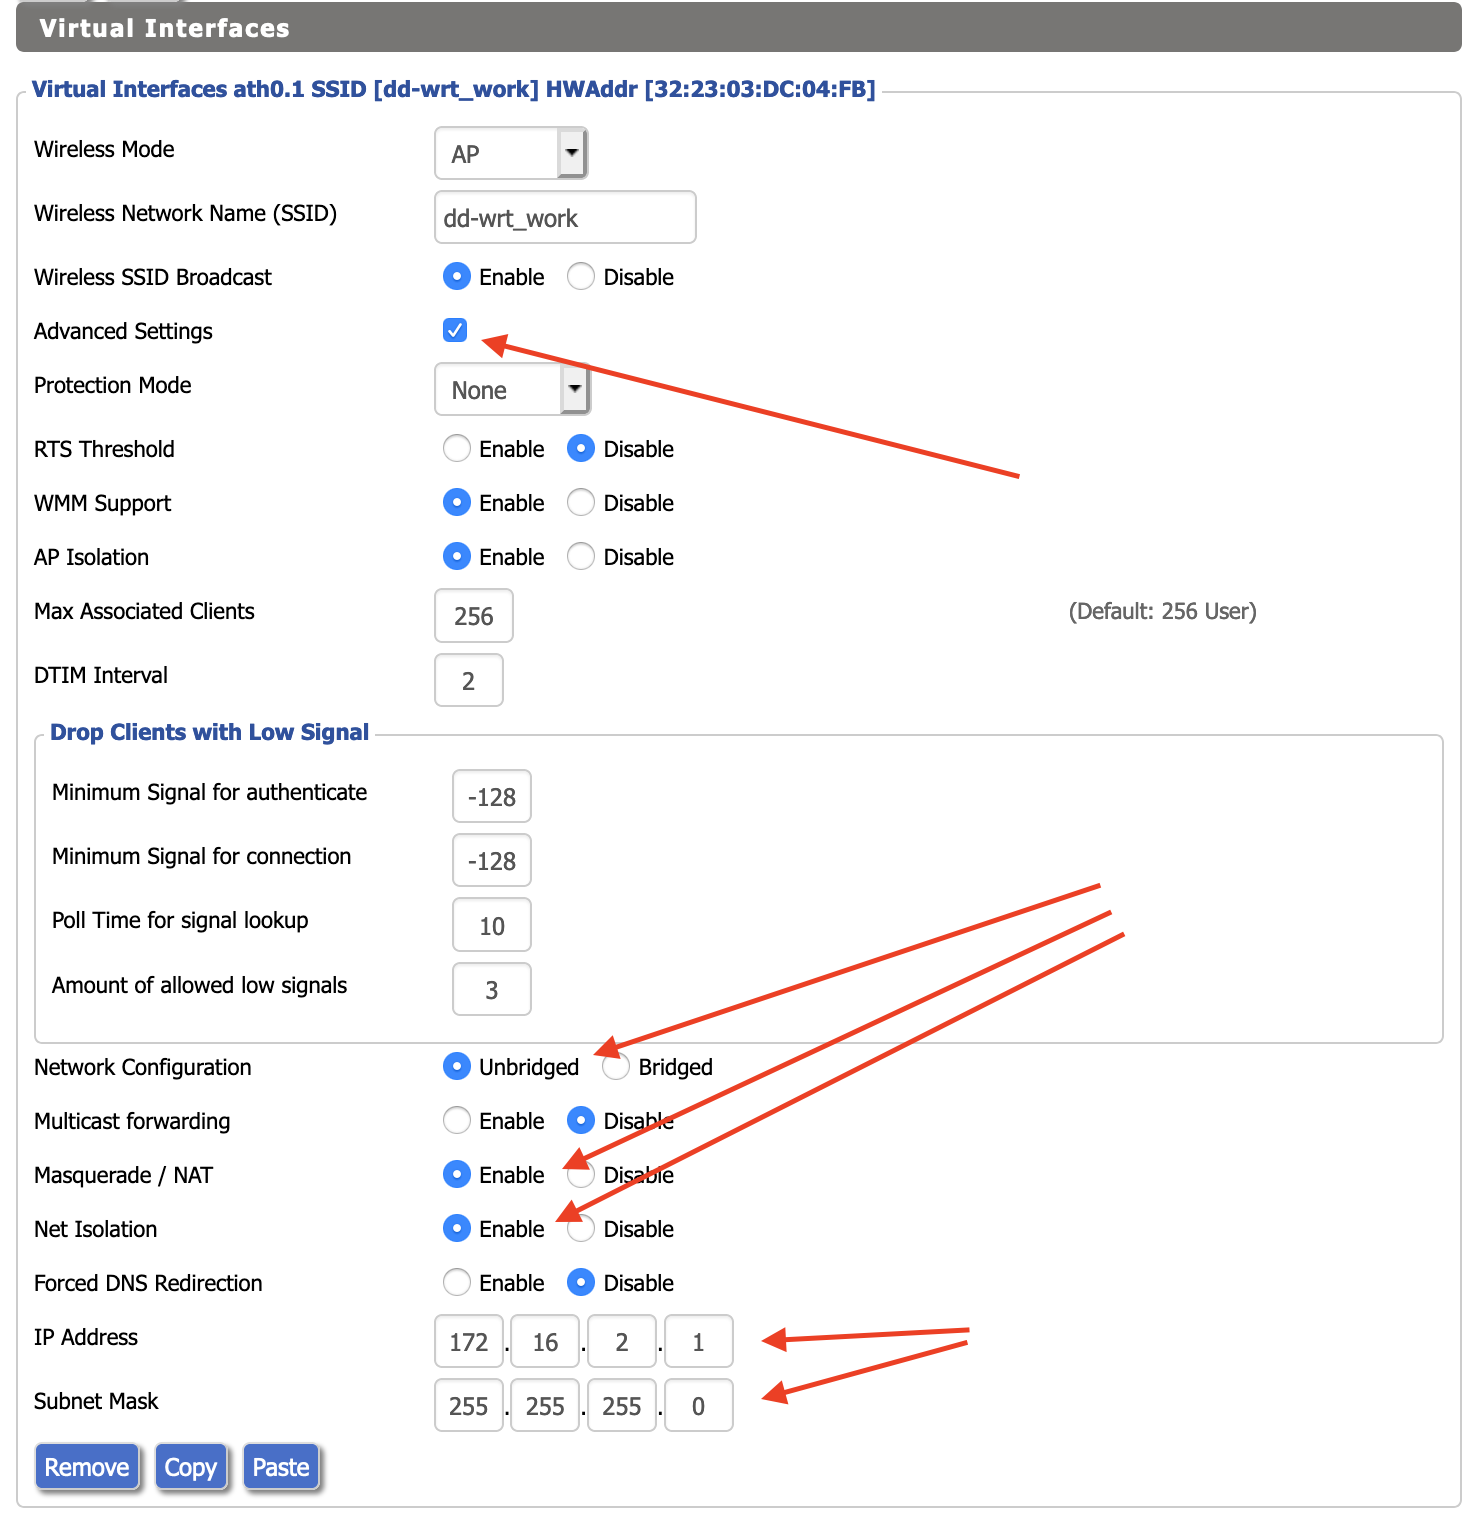
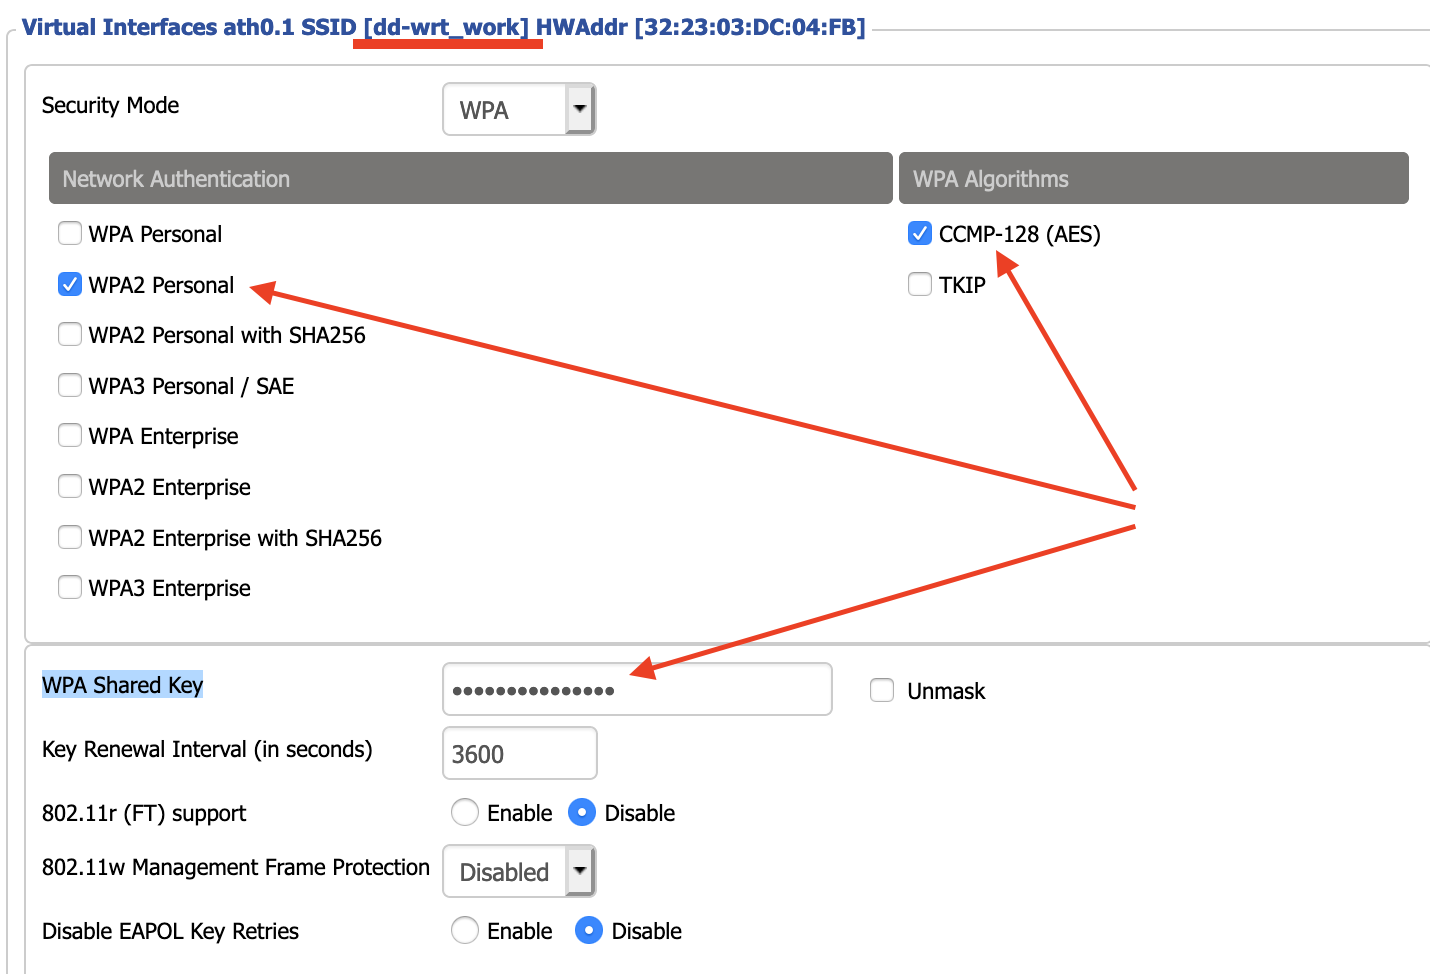
- Setup Security. Next, we will set up encryption. Go to tab Wireless Security and go to the section that shows the name (SSID) of our newly created WiFi. Tick WPA2 Personal, CCMP-128 (AES) and enter the WiFi password into WPA Shared Key. Hit Save.
- Set up DHCP. To automatically assign an IP address to devices on our new WiFi, we have to enable DHCP. Go to tab Setup -> Networking, scroll to section DHCPD at the bottom. Click Add and select the interface belonging to our new WiFi (most likely
ath0.1) and hit Save.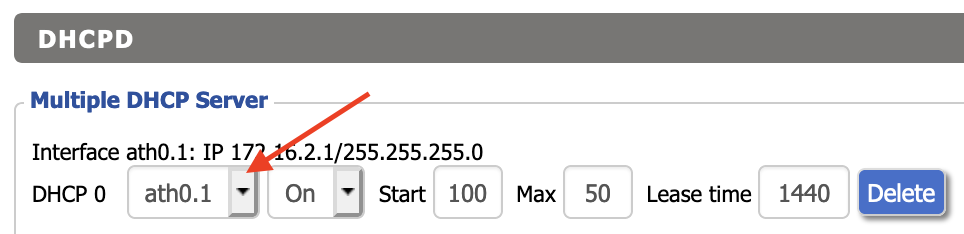
That’s it. If you search for nearby WiFi on your work notebook, our new WiFi should show up with the name you assigned.
Above steps are adapted from an existing guide.